Showing posts with label natural. Show all posts

Thursday, 21 July 2016

Rich Mahonia Syrup

Rich Mahonia Syrup

Not only does this look good IT IS GOOD!


© Fig 1.L.Moore. Rich Mahonia Syrup with yogurt and fresh fruit

What can I say? When I first came across these dark rich tiny black beauties I thought 'woah...I bet they are dangerous'. I'm guessing there are millions who also thought the same. Good news my friend these little gems are indeed edible. Don't get me wrong they pack a seriously bitter punch to your tongue but they are worth the effort. Because of their bitterness they are understood as a 'bitter' which is, I believe, very good for the liver as it help the body secret fluids through triggering the bile ducts so no wonder it's used as a detox for the body.

This Oregon Grape known as Mahonia aquifolium is found throughout England in hedges, woods, gardens, parks and other public places. I came across these a few gardens down from where I live. I was walking by the said house while the occupants were doing a bit of gardening. I asked them what the plant was called and ran home and did my research. I ran back the next day and pleaded for some of their berries. There was a look of bewilderment because the owners of the plant had always assumed the berries were poisonous. 'Nope I said with pride...they are definitely edible'. I explained how bitter the are and how sugar is a must for cooking. I was up against the clock because the birds had had a field day on them over the past 24 hours.  

I had anticipated a few jars of jelly or jam but the birds beat me to it...the beloved plant was near bald when I got there. I know...I know...there is plenty for everyone and we all need to share with our little feathered friends. What is fab is now I know them I see them everywhere. The berries are about from June onwards. Right now though I can't find a shrub with any fruits on so you need to be quick.

Anyway here is my amazing Rich Mahonia Syrup made from the ripe fruits.

Rich Mahonia Syrup
A bowl of fruits
about half a pound of sugar (taste as you go)
squeeze of a little lemon juice
Cover your berries with about 2 mugs of water (just covering)
Potato masher

Method

I washed my berries in cold water and placed them in a pan. Cover the fruits with about 2 mugs of water. Bring to the boil and simmer for about 10-15 mins until your water runs a rich purple. While it is simmering use your masher and mash up the berries to extract more juices. Now add your sugar (try adding a bit at a time until it is sweet enough) and keep stirring until the sugar dissolves. It should be quite sweet because you will only use a little at a time. If needed add a little more water so it is not too thick. Once you have added your sugar simmer for a further 5 or 10 mins but keep an eye on it so it does go like toffee. You want your mixture just very slightly thick while it is hot because when it cools down it will go thicker. If your not sure turn the heat off and wait until it cools to check the consistency of your syrup. If you cool it down this way you can always make it thicker by adding more sugar and warming it up again but the reverse is not possible. If it is too thick while it is hot it will cool down like toffee (who knows it may come in handy) so watch it well. When it cools down pour into a jar and place in the fridge and use when you need it.

This syrup is very diverse. I have used mine with yogurt and fresh fruit...yummy. Also it can be used with ice cream and cereals and/or your granola, added to stir fries and gravies...delicious. You could even add hot water to it and make it into a nice hot drink or you could cool your drink down and add some soda water to make a refreshing drink with some mint...Ta Dah.


© Fig 2.L.Moore The Oregon Grape Shrub 
© Fig.3.L.Moore Oregon Grape close up
© Fig 4.L.Moore Oregon Grape to scale with a coin 
© Fig 5.L.Moore. Syrup with yogurt and fruit
© Fig 6.L.Moore. Making Syrup in Pan
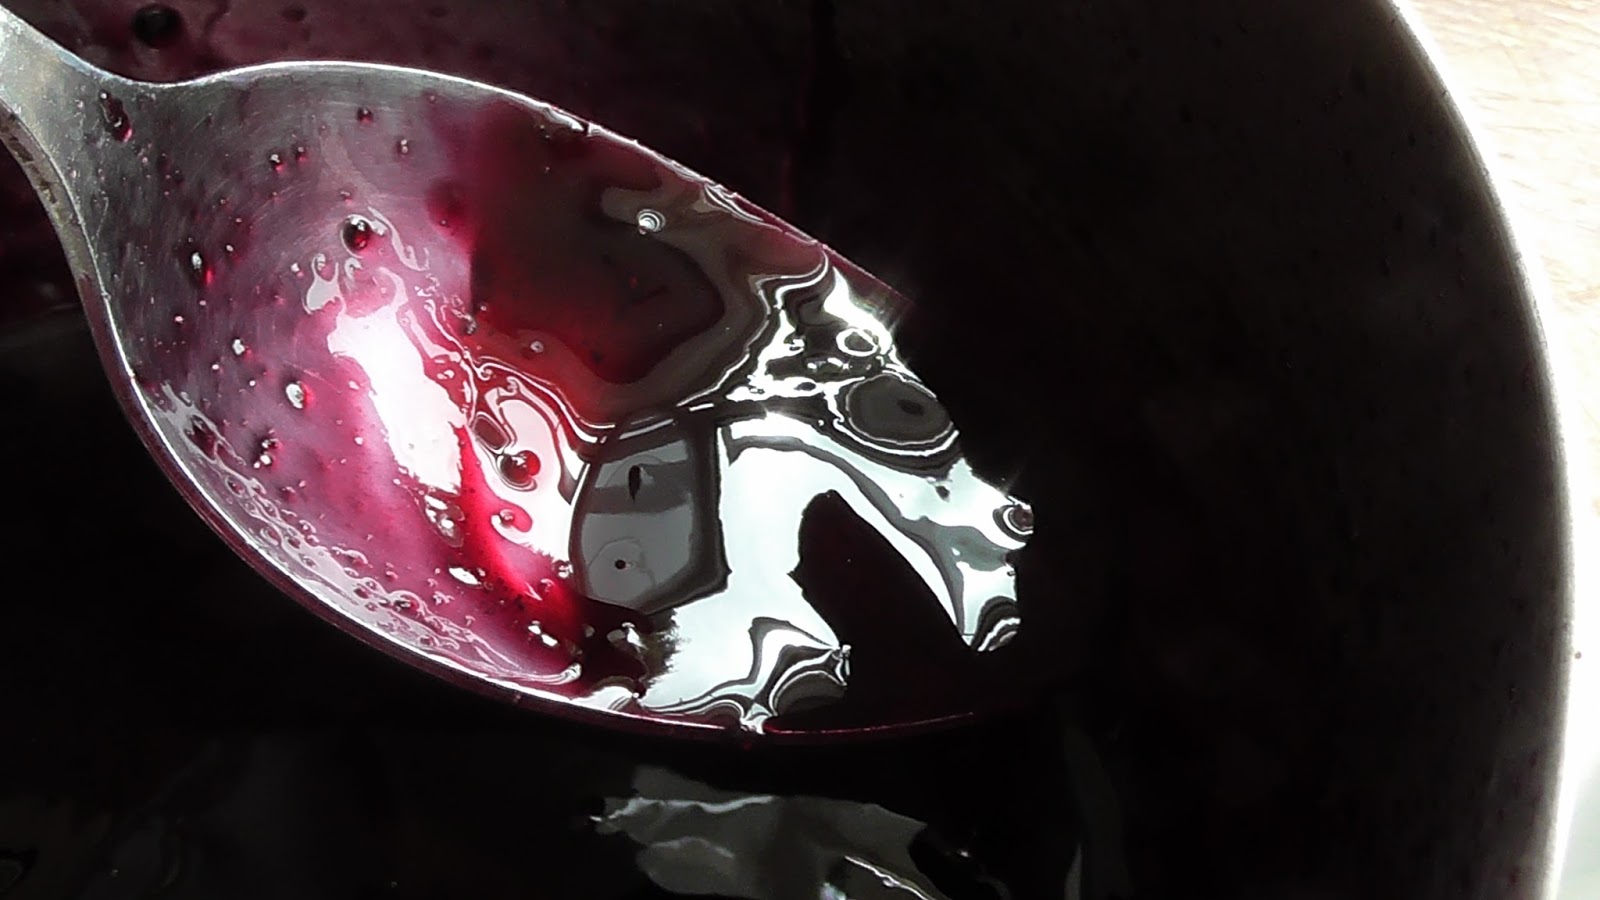
© Fig 7.L.Moore. Lovely glossy syrup
© Fig. 8. L.Moore Pouring syrup on fruit & yogurt...yum
This shrub is so versatile the leaves, the bark and roots are also used medicinally for a number of ailments. Berberine is a chemical constituent found in several different plants and it is one of the main ingredients that attracts herbalists to this shrub. There have been many claims that the Oregon Grape Root is good for including: lowering blood sugar levels, fights infections, skin infections, drains and detoxifies, an anti spasmodic, and other claims are the impact it has on the liver because it is understood to be a hepatic (herb for the liver). The berries are also packed with vitamin C.

Remember to forage responsibly and always be extra careful that you know 100% what it is you are about to eat. Check with friends and do your research and only try in small quantities first  "if in doubt leave it out". Check a variety of sources and do not always rely on the internet as a source of truth...make your own mind up. There will be other fruits about that are dangerous look a likes.

IN saying that don't be discouraged go and forage with a group of friends and enjoy the wonders of a new window to the world. Start with safe options like dandelions if your totally new to foraging...it's amazing.

Enjoy!

Description
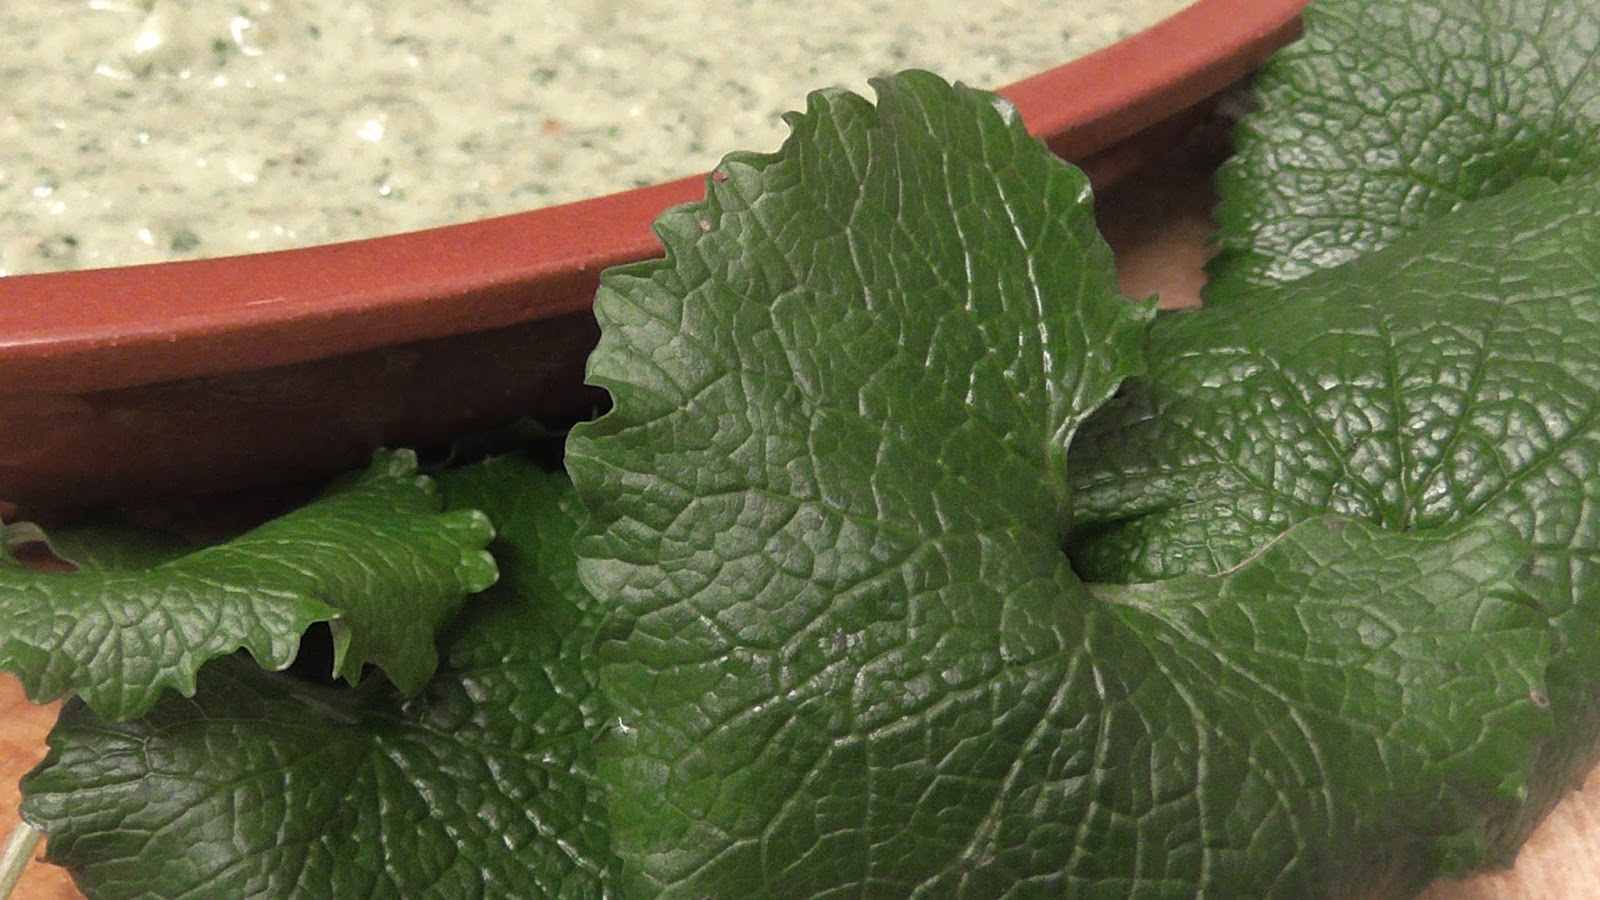
A small evergreen shrub with dark green, spiny holly-like leaves and bright yellow flowers in dense clusters, which later produce blue fruit in clusters resembling bunches of small grapes. Flowers January-May; fruit ripe June onwards.

Disclaimer
The information in this post is not my expert opinion on herbal medicinal remedies and/or health claims. Everything I say about this plants medicinal properties are taken from a number of sources which you can access below.

Source material

Irving, Miles (2009) The Forager Handbook:A guide To The Edible Plants Of Britain, Ebury Press, p50.
http://www.herbalremediesadvice.org/oregon-grape-herb.html
http://www.peoplespharmacy.com/2005/10/18/oregon-grape/


Tuesday, 29 March 2016

Hibiscus body and face treatment

Hibiscus Body & Face Treatment

Whoa! this is so amazing.


Fig.1. L.Moore. Hibiscus plant
This plant is full of wonder and amazing for the skin. This is a stunning ornamental plant and the flowers are used as a popular drink in Egypt.Other parts of the plant can be used for making jams,soups, sauces. The flowers are trumpet shaped and come in lovely colors (pink, red, orange, purple or yellow). It is known as the 'botox plant' for it's powerful anti-ageing properties that lifts and firms the skin. Hibiscus increases the elasticity of the skin and is used in many creams that are very expensive. Here is an opportunity to make your own skin wonder.

The Hibiscus plant has powerful anti-ageing qualities due to it's promotion of skin elasticity, it is rich in antioxidants and evens skin tone and purifies the skin. The flower is a genus of flowering plants within the mallow family (also called rosemallow) with several hundred species. Traditionally the Hibiscus plant has been used for loss of appetite and current research is looking into it's qualities that may help cancer and reduce blood pressure among a list of other benefits. See my attached source material so you can read more about this plant and make your own decisions on using this plant.

Fig.2.L.Moore Hibiscus body & face treatment
Fig.3.L.Moore. Close up of Hibiscus face & body treatment
Fig 4. L.Moore A close up of whipped cream


Fig.5. L.Moore. A Bain Marie of oils and waters
Fig 6. L.Moore. Lovely whipped body treatment
Fig 7. L.Moore. whisking the body cream

Method & Ingredients

25ml Castor oil
50ml Avocado oil
105ml Rapeseed oil
150ml Hibiscus infused water and/or hydrosol
50 drops of Rose Geranium essential oil
50 drops of Frankincense essential oil
1oz Emulsifying wax 

Method
Measure your oils and emulsifying wax into a bain marie which should add up to 180 ml (25 ml castor oil, 50 ml avocado oil, 105 ml rapeseed oil). You can make your own bain marie by placing a heatproof bowl into a pan of water. You only need a little water (approx a third of the pan) and make sure your bowl does not rest on the bottom of the pan and heat up. Now get another bain marie and add your water (150 ml of hibiscus infused water or tea) into your heatproof bowl. Heat both bain marie's until they reach a temperature of 70 to 75 degrees  C. Heating the oils and water to this temperature kills off any bacteria. 

When you have reached this temperature the next phase is to add the water slowly to the bowl of oils. To do this safely take the bowl of oils with an oven glove and place on the kitchen top and then pour the water slowly into the oils. As you do this it is important you do it slowly and whisk the ingredients together. Keep adding the water and whisking at the same time until all the oil and water are mixed together into one substance. Let your lovely mixture cool down. If it looks like it is splitting then whisk again. When it has cooled down now add you 50 drops of Rose Geranium and 50 drops of Frankincense essential oils and whisk. When it has completely cooled down place into glass sterilized jars and put the lid on. Ta Dah...now enjoy.

All my recipes vary when it comes to mixing oils and water. Sometimes I add the water to the oils and then at other times I add the oils to the water. This is important because it changes the thickness quality of your cream. This is a thick body treatment that you can use all over your body including your face. I would recommend if your doing a full body treatment to apply it to a warm body after a bath and walk around in your baby-suit for a few minutes until it sinks in...yum. 

Frankincense essential oil comes from the Boswellia sacra frankincense tree and I have attached a research paper for you to look at. Apparently Frankincense has been the focal point of a study as a possible anti-glycation. Glycation is the one main aging factors on the skin as sugar molecules in the body bombard cells bonding with fats and proteins (see sources). Both Frankincense and Rose Geranium are understood to be great for the skin. 

As with all of my recipes it  is wise to apply a tiny amount (a patch test) to your skin first before 'going for it' as a whole body treatment. This is to be secure that you do  not react to it in any way. Try it on your body first before the face as this is an intense cream. Also use a sunscreen if you are using it on the face. 

The buzz word at the moment in a lot of beauty cosmetics and creams are AHA's. The following quote is taken from Wikipedia.  

"AHA's are a group of organic carboxylic compounds. AHAs most commonly used in cosmetic applications are typically derived from food products including glycolic acid (from sugar cane), lactic acid (from sour milk), malic acid (from apples), citric acid (from citrus fruits) and tartaric acid (from grape wine)". 

All of the beauty products and creams claiming to have these organic carboxylic compounds in are pretty expensive and over exaggerated. Apparently 99% of AHA's in cosmetics are synthetically derived and are in low concentrates of less than 3%. AHA's can exfoliate the skin cells and they do this by breaking down the substance in the skin that holds skin cells together. It has been noted that 15-30% of Hibiscus tea is composed of organic acids including malic acid, tartaric acid and citric acid (vitamin C). These are commonly found in fruits such as grapes and wine. So don't go out and spend lots of money on such hype make your own using hibiscus tea at a fraction of the cost. Have a look at the cost of some of these products and see for yourself.    

I will be doing some workshops throughout the year in the Bedfordshire, Hertfordshire and Buckingham area in the UK. Email me if you want to know when they are being held and where. My workshop/course is for half a day and it's well worth it. With me you can learn a lot about about all the incredible oils, and ingredients that go into high street creams that you can make for a fraction of the cost. You learn a specific recipe of  mine that you can use to create your own individualized super cream and understand some of the buzz words the cosmetic industry tries to blind you with. I will be doing a post on this so look out for it. 

Sources
https://en.wikipedia.org/wiki/Hibiscus
https://www.greenpeople.co.uk/beauty-hub/blog/5-hibiscus-benefits-beautiful-skin
http://www.annmariegianni.com/ingredient-showcase-hibiscus-the-natural-botox-plant/
http://www.paulaschoice.com/cosmetic-ingredient-dictionary/definition/aha
http://www.skinstore.com/malic-acid.aspx
https://www.organicfacts.net/health-benefits/beverage/hibiscus-tea.html
http://www.ajol.info/index.php/tjpr/article/view/93284
http://www.cosmeticsdesign.com/Formulation-Science/Anti-glycation-treatment-needed-to-fight-skin-aging-effects-of-sugar

As with all my sources they are here just for a point of reference and it is always wise to check the reliability of source material.I include them for you to make your own mind up.

Wednesday, 17 February 2016

Thirsty Rose Face Cream moisturiser

                                                         Thirsty Rose Face Cream

Whoa this is truly amazing and great fun to make once you get the hang of it. I can't tell you how wonderful this cream is. After many experiments this is a great recipe for  both the face and the body. This moisturizer is much richer than my body creams and sinks into your face like a breeze. It smells divine and it's packed full of wonderful goodness.


Fig.1. L.Moore. Homemade Thirsty Rose Face Cream 
Fig.2. L.Moore. Red Rose 

Recipe

1 oz Emulsifying wax
90 ml coconut oil
90 ml Avocado oil
150 ml Rose water
50 drops Rose Otto essential oil
2 drops vitamin E oil

Create two bain marie's (a glass bowl placed on top of a pan of water) on your stove. In one bowl measure in your oils (emulsifying wax, coconut oil, avocado oil) and in the other bowl add your measured rose water. In order to get your coconut oil from hard to soft before you pour it in the bain marie melt it in the microwave for a dew seconds and then you can measure it. Heat both bowls to approx 70-75 C until your oils have melted. When both the oils and water are the same temperatures take the water bowl out of the pan (with an oven glove or tea-towel and place on kitchen surface. This is really important now ... add the melted oils to your water slowly while you whisk at the same time. Keep whisking and adding your oils slowly until all the solutions are mixed together. Then wait for the mixture to cool down. As it is cooling down if your mixture looks like it is separating then whisk again until it binds together. When it has cooled down a little more then add 50 drops of rose essential oil and 2 drops of vitamin E oil and mix together. When it is cold spoon into clean sterilized jars or pots. Ta Dah...

I have tried many recipes and oils and variations on oil/water mixes and I find this one works the best for me. If you reverse the process and add water to the oils your  mixture is a lot more greasy.I find this consistency works really well for me. The avocado oil is amazing for the skin. It is high in vitamins, amino acids and fatty acids and exceptionally good for dry mature skin (I am a 110 years old really LOL). The coconut oil is also packed with fatty acids which is fantastic for the skin. I have been making this cream for a while now and it lasts me for about a year. I do tend to keep my main supply in the fridge. I pot what I need and go back to the fridge when my little pot is empty. My friends love it.

You can experiment with all kinds of oils and waters for different skin types to explore. Hey you can even use cooking oil, olive oil, carrot seed oil (also fab for the skin) and lots and lots more... herbal tea waters also work well that can change the color of your creams to delicious pinks and lemons for the body. Now what more can I say about rose essential oil ... it is absolutely invincible for the skin. It has been a popular oil for the skin in all kinds of skin products which are really expensive so why not make your own. I use the Bulgarian rose otto oil and it is just divine. When you put this cream on your skin your skin drinks it. It glides across your face like silk and the smell lifts you from one realm to another. Just pure heavenly pleasure.

I feel the luxury of this wonderful rose twice a day. First thing in the morning and last thing at night I immerse myself in the luxury of this amazing flower. In one action I get the pleasure of smelling summer in through my breath and out through my nose...ah now that's something to put a smile on your face while you sleep or start your day (such a small pleasure to brighten up your day).

Fig.3. L.Moore. Bain Marie's of oils and waters 

Fig 4. L. Moore. Mixed oil/water with electric whisk

Fig 5. L.Moore. Coconut oil

Fig 6. L.Moore. Rose Otto Essential Oil

Fig.7. L.Moore. Avocado oil (and other equipment)


I use the coconut oil you see in the picture. I have been using this coconut oil for many years which is much cheaper than the extra virgin coconut oil.  Also I use this in cooking and I am well aware of the debate on whether this brand is hydrogenated or not. There is lots of debate about virgin verses refined which you may want to do your own research on and decide for yourself.


Source material

http://www.bulgarianroseotto.com/
http://veganheath.info/ktc-coconut-oil-review

Monday, 15 February 2016

Goosegrass/sticky-willy Pesto

                                                 Goosegrass/sticky-willy pesto


Fig.1. L. Moore Goosegrass Pesto

Who would have thought that green stuff that sticks to your clothes like Velcro could be amazing for the body and above all free and edible. Well it's about right now in our towns and cities, gardens, waste-ground etc... it's young and at it's best so get plucking. This plant is also known as 'sticky-willy', 'cleavers' and 'scratch tongue' (I know it doesn't sound great but believe me it's not bad at all). The young shoots can be used in salads and all of the plant can be used in soups, ointments for the skin and juicing. Eat the stems while young before the plant sets seed and become tough. There is no time like the present so give it a go. Let's go and get some 'sticky-willy' and be creative. If your bored and need a reason to get out and about then 'go-seek and find' ... YaY.

Honestly there is nothing better than finding a free edible and rushing home and experimenting with it. I came home with a small bag of the stuff and made this lovely pesto ...Ta Dah. Then my entire meal was designed around my new creation. As it was pancake Tuesday this week my partner and I went overboard with making pancake mix and we have had pancakes all week. Needless to say I had my pesto spread onto a pancake with oven baked chicken breast and lashings of cheddar cheese ...oh yes it was yummy. Terrible for the midriff but hey ho it's only once a year (the pancakes that is). I can think of many ways of using this pesto with the obvious pasta, on toast with a variety of toppings, adding it to risottos and perhaps toppings for soup with a bit of cream. mmmm... My only criticism of my recipe was I put too much salt in it so I had to use it sparingly. But we all live and learn and I'll know better next time.

Goosegrass/sticky-willy Pesto

4 cups of goosegrass (or half carrier bag)
4 cloves of garlic
1 tbs pine nuts
3 tbs grated Parmesan cheese
1 tsp lime juice
salt to taste
add olive oil as you mix ingredients

Wash your goosegrass in the sink with a little salt to get rid of any bugs and/or dog bacteria. Pat the goosegrass dry and place in a bowl or blender. Add the remaining ingredients and blend all together. Add the olive oil  bit by bit until it is the right consistency and enjoy. You need quite a lot of goosegrass. The image I have put on this blog is half a jar made from 3 cupful's of goosegrass. As with all my recipes experiment and explore with your new wild edibles and have fun. Also if you are unsure about what you have picked remember 'if in doubt then leave it out'. Be certain of what you have.

Fig.2. L.Moore Goosegrass/sticky-willy pesto

Fig.3. L. Moore goosegrass growing down a path

Fig.4. L. Moore A close up of goosegrass


According to the book Hedgerow Medicine, Harvest and Make Your Own Herbal Remedies, by Julie Bruton & Mathew Seal (2008) cleavers (goosegrass) 'promotes the lymphatic flow and helps rid the lymphatic system of metabolic waste. In effect, it is like a pipe cleaner for our lymph vessels' (2008, p.31). Cleavers are understood as a useful remedy for swollen glands, tonsillitis, and adenoid problems and earache. Because of it's effect on the lymph system cleavers enjoy a reputation for helping to shrink tumors, both benign and cancerous, and for removing nodular growths on the skin. Other benefits include promoting the flow of urine and soothes irritation of the urinary tract. It relives the scalding pain on urination associated with cystitis and used as a remedy for kidney inflammation and irritable bladder. It is also effective in clearing grit, gravel or calcium deposits in the urinary tract.    

Description
'Very common native annual. Stems are made sticky by downwardly curved prickles. Leaves, in whorls of 6-8, are up to 50 mm long, pale green and thin, with sticky, prickly edges. Young shoots grow upright; the layers of whorls quite geometric and ordered but they sprawl out as they grow, eventually forming a thick, tangled mess. Tiny greenish white flowers grow in loose clusters from the axil of the upper leaves; the fruits are the familiar sticky burs.'. This text is taken from the forager handbook by Miles Irving, (2009)  p 51-52 A similar species is the 'Sweet Woodruff' which has smooth stems and leaves and white flowers (also edible).

References/useful resources
Bruton-Seal, J & M. (2008) Hedgerow Medicine, Harvest and Make Your Own Herbal Remedies, Merlin Unwin Books, pp 30-33
Irving, M. (2009) The Forager Handbook: A Guide To The Edible Plants Of Britain, Ebury Publishing, pp 50-51
http://www.herbalextractsplus.com/goose-grass.html
http://www.woodlands.co.uk/blog/woodland-flowers/white-flowers/bedstraws-and-cleavers/


Friday, 5 February 2016

Guelder Rose Cramp Bark Decoction


Guelder rose Cramp Bark Concoction (viburnum opulus)


L.Moore.Fig 3. Cramp Bark Decoction 

L.Moore. Fig 1&2 dried bark crushed & put in a jar


This is a wonderful drink. It is a bright red soothing drink and it is taken from the bark of the Guelder rose tree. Most books suggest taking the bark in April/May but I have been taking mine in Jan/Feb and it is truly wonderful. I can't tell you how incredible this tree is. It has the most outstanding scarlet berries in late summer and wonderful flowers in the spring and of course the tree bark. All of these can be used in all sorts of delicious exciting ways which I will introduce in new posts (i.e jellies, cordials, jams etc.). What is extraordinary about the bark is the many medicinal qualities it offers the body. The bark has been used as an anti-spasmodic, a sedative and an astringent.

Cramp Bark has a reputation as a relaxer of muscular tension and spasm and it has two main areas of use. 'Firstly in muscular cramps and secondly in ovarian and uterine muscle problems'. (Hoffman 1990, p 194).  According to David Hoffman, in his book Holistic Herbal: a safe and Practical Guide to Making and Using Herbal Remedies (1990) Cramp Bark will relax the uterus and so relieve painful cramps associated with periods (dysmenorrhoea). It may also be used 'to protect from threatened miscarriage. Its astringent action gives it a role in the treatment of excessive blood loss in periods and especially bleeding associated with the menopause.' I have also read it  has been used for arthritis, muscle tension in skeletal muscles, back pain, fibromyalgia, irritable bowel syndrome and high blood pressure. In the book Hedgerow Medicine Harvest and Make Your Own Herbal Remedies (2008) Julie Bruton-Seal  & Mathew Seal cramp bark helps in rheumatic conditions where the pain is from tension rather than inflammation, easing the pain and improving blood flow to the affected area.    

Reference
Bruton-Seal, J&M. (2008) Hedgerow Medicine:Harvest and Make Your Own Herbal Remedies, Merlin Unwin Books, (p. 62).
Hoffman, D. (1990) Holistic Herbal: A safe and Practical Guide to Making and Using Herbal Remedies, Harper Collins Publishers, (p. 194)

Cramp Bark Decoction

Method
Use a small knife to remove the bark in short strips, taking care not to take too much from any branch. Do not ring the limb or it will die. The bark can be used dried or fresh. I dried mine out on a clean sheet of paper in my kitchen which took about four days. The bark begins to dry with a lovely orange tinge to it. When it dried out I placed it in a plastic bag and bashed it with a rolling pin to break it up into tiny pieces and placed them in a dry glass jar.

Making your decoction
Put about 1-2 tablespoons of bark in a pan and cover with water (enough for about a large cup of tea). Bring to the boil and then simmer for about 10-15 minutes. You will notice the water turn  a lovely red/orange color. Turn off the heat and sieve into a glass or cup and drink with honey if desired. It is an acquired taste but not unpleasant. You can take this twice a day if needed.

I have had this many times and I really find it soothing on the stomach. I read somewhere it acts like an aspirin on the stomach. I am not sure if you are allergic to aspirin whether it would affect you so I would probably stay away from cramp bark.  It is always best to be safe. However I find it a good relaxant for the stomach. Below are two images of the Guelder rose tree taken in October 2015 with the berries on. I took my bark in January 2016.

L.Moore Fig.4. Guelder Rose Tree taken in Oct
L.Moore Fig. 5. Berries on the tree (Oct 2015)


Thursday, 4 February 2016

Jack (garlic mustard) Salsa Verde

Jack Salsa Verde

Oh my goodness this is to die for... it is much lighter than my 'nettle verde' (see other posts). This truly is a taste sensation and I had it with my homemade bread and my scrumptious nettle soup. What is most amazing about this little gem of a dip is the fact one cannot buy it in the supermarket and I feel rather pleased with myself. Whenever I come across jack-by-the-hedge or it's other name (garlic mustard) I can't resit picking it. I pick a little from each patch and gather in different locations to keep it going and leave plenty for other gatherers. There is nothing quite like picking your own food and experimenting with it.

All my recipes are intended to be exploratory. I document my experience as a forager and like to share what I can do with these wonderful wild edibles. I always know when a experiment is successful because the food is scooped up immediately and I have my partner and friends to thank for that and their wonderful honest comments. I will continue adding 'Jack' to my food creations so keep an eye out for new taste sensations.

I made my 'Nettle & Jack Salsa Verde' a few weeks ago and it was very powerful indeed. It packed a punch with it's taste and the colour was truly amazing. From that 'Jack Verde' was born ... and boy am I glad I made this ... I love it. Here is the recipe and I hope you enjoy it as much as I do. Spread it all over a homemade bread, have it with cheese or plonk it on top of a good fish ... the list is endless ... just try it ... yum!


Fig. 1. L. Moore 'Jack Salsa Verde' 

Fig .2. L.Moore A Detail of 'Jack Salsa Verde' 

Fig.3. L.Moore 'Jack Verde' with my homemade tomato bread
Jack Salsa Verde

1 decent sized bowl of jack-by-the-hedge
2 handfuls of pine nuts
2 anchovies
1 large tbs mascapone
4 good sized cloves of garlic
1 handful of capers
1-2 tbs lime juice
A good glug of olive oil
Salt & black pepper

Wash your jack in a bowl of tepid water. I add a little salt (to get rid of any nasties) and give it a good wash and then sieve and rinse under the tap to get rid of the salt. Add your jack and all the other ingredients into a bowl and wiz up with a hand blender (or put them all in a blender) until it is a nice consistency. Ta Dah it's done. Spoon it into a nice dish and eat ... Yummy.  Oh for decoration add a touch of olive oil on the top and a few Jack leaves.

This recipe can be altered in any way you wish. If you like it a little thinner add more oil etc and less mascapone ... just explore and enjoy.


Spicy Green Nettle Soup

Spicy Green Nettle Soup

Without doubt we have all heard of nettle soup but I'm guessing not many of us have tried it. I for one am guilty of this so I thought it was time to try it. I even managed to talk my partner into nettle hunting with me. What better way to bond as a couple than to go foraging (especially when your other half is no way as near interested as you are about foraging). So together we had our carrier bags, hardy gardening gloves (for the sting), camera and scissors. We had fun comparing notes and looking for the best crop of nettles. We found some dead nettles and some stinging nettles on a walking path near our home. The location is popular with dog walkers so try and pick those as far away from the 'dog leg arching' as possible and give them a good wash in tepid water and a bit of salt.

I enjoyed identifying some other edible weeds on the way which created a great discussion for us. Hey I was even taken to a location not too far from us to identify a horseradish my partner had seen a few days earlier (so he does listen LOL). My constant chatter about edible weeds and plants has rubbed off on him. Anyway it wasn't a horseradish but I did appreciate the observation and interest so for that a gold star for my man.

We found an abundant amount of both stinging and dead nettles. We only picked the young leave tops as they are apparently nicer to eat. I should own up at this point that my partner was allocated to gather the nettles whilst I gathered and dug up some dandelion roots and leaves which I will discuss in another post. However we had a really pleasant morning discussing weeds and how we were going to make a fab nettle soup which neither of us had ever had. With almost a bag full of nettles the rain began to descend on us and we headed home.  

My partner looked up some recipes and he settled on Hugh Fearnley's nettle soup recipe from the TV series River Cottage. So I adapted his recipe to create and make an amazing super soup with a punch.

Fig. 1. L. Moore Spicy Green Nettle Soup 

Fig.2. L. Moore A detail of Spicy Green Nettle Soup 

Fig.3. L.Moore. Ready to Eat Spicy Green Nettle Soup ... Yum!


Ingredients (for about 4 people ... though we had it between us)

1 tbs butter (or coconut oil)
1 nearly full carrier bag of nettles
1 large onion
1 large carrot
1 large potato
Parmesan cheese for grating
A half to a litre of vegetable stock (or chicken). The amount depends on how thick you like your soup so I add half and then top up until I have the desired thickness
Season with salt and pepper
3 small dried red chillies (optional as we love chillies)
3 cloves of garlic (optional as we love garlic)
Creme fraiche
Olive oil

Method

Wash your nettles in a sink of tepid water (wear gloves) and then put in colander and rinse again
Melt butter/coconut oil in a large pan
Add your finely chopped onions and garlic and chillies and cook until nice and soft
Add your chopped carrots and potato and stir. Then add half a litre of stock and simmer with lid on for ten mins.
Then add your nettles and simmer with lid on for 5 or 10 mins until vegetables are just soft.
See if you need more stock and if you do add more and stir. When ready turn off the heat.
Then blitz with a blender until smooth
Add seasoning
Pour into your lovely bowls and add some creme fraiche, and top with  grated Parmesan and a glug of olive oil.

Hey presto slurp it down with a good home made bread ... yum.


Some information on nettles

The stinging nettle is a course upright perennial, covered in fine hairs and their leaves are toothed and heart shaped. They are packed with high levels of vitamin A and C, and also contain iron and protein. The dead nettle is very similar to stinging only they don't sting when touched. Their leaves are in pairs, triangular , pointed and coarsely toothed.

Sources
https://www.rivercottage.net/recipes/nettle-soup
Richard Mabey (2012) Food For Free Harper Collins Publishers, London. p, 63 &104


Nettle & Jack (garlic mustard) Salsa Verde

Nettle & Jack (garlic mustard) Salsa Verde

Wow what a way to use your fresh foraged wild green weeds than to make a salsa verde. This certainly does live up to it's name (green sauce). This is packed with a punch of vitamins. When I was eating this I felt like I was taken back in time during my ancestral period but without the trimmings. The colour takes your breath away ... it is very dense and moss like. "Stinging nettles are one of the best plants for human health, both as food and medicine ... a complete, ready-packaged natural vitamin and mineral supplement" (Bruton - Seal J & Seal, M, 2008, p 114). We can find stinging nettles everywhere in out hedgerows packed with protein, calcium, vitamin c, beta-carotene and chlorophyll.

Jack by the hedge known as garlic mustard or (Alliaria petiolata) is found in shady hedgerows and woodland edges and it contains glucosinolates and apigenin flavonoids, both known to have anti-tumour effects and high in vitamin A. "The leaves also contain cancer preventing chemicals typical of both garlics (allyl sulphides) and mustards (isothiocyanates)" (Irving, M. 2009, p 77).

So no wonder this green sauce is such a winner. I would experiment with this recipe as I have based it on my own palette where I like a lot of garlic and chilli and the anchovies add a strong salty taste. I made this to go with my salmon steak with a wild mushroom risotto. You may decide to omit some ingredients and add more olive oil and make it more fluid. However I would always  recommend experimenting with my recipes to make them to your own liking. I see my recipes as a starting point to explore wild foods and alter them to your own taste buds. It is the sheer  'act' of gathering these wild weeds that makes this such a wonderful experience and journey of discovery.

Get yourself outdoors on a brisk January day and experience the thrill of looking, finding and exploring. It really is worth it. I forget myself when I am absorbed in looking for these weeds. I feel a real balance between mind and body in a state of complete absorption, it's a great feeling ... . so go and try it. As I have said in all my blogs 'if in doubt leave it out'.

When your new to foraging always make sure you know what you have and check it with diagrams and pictures and a number of sources (not just the internet) and having another pair of eyes to help you identify your find is always useful so bring someone with you. It is fun doing the research and when you feel sure always try a little first. Tasting small amounts is always wise just in case you don't agree with it. Remember you have never eaten these foods before.

Fig 1. L. Moore Nettle & Jack Salsa Verde 

Fig. 2. L. Moore. Nettles washed and ready for simmering

Fig.3. L.Moore. A detail of Salsa Verde topped with Jack leaf

                                      Fig.4. Salmon Fillet with Nettle/Jack Verde & wild mushroom risotto                          


Ingredients

Half a carrier bag of stinging nettle tops (or non stinging nettles)
1 cup of jack by the hedge
3-4 anchovies
6-8 cloves of garlic
2 tbs mascapone soft cheese
2 tbs (or handfuls) of pine nuts
2 tbs olive oil
2 small dried red chillies
1 tbs lime juice (or lemon)
salt and black pepper to taste


  • Wash the nettles in lukewarm water and salt and strain (then rinse again to get rid of the salt)
  • Boil the nettles for approx 3 mins until soft and then plunge them into ice cold water
  • When cool squeeze the water out of the nettles
  • Add the squeeded nettles into a bowl with all the other ingredients and blitz with a blender
  • Put into a nice bowl and add a glug of olive oil on top and serve


Ta dah its ready (it should keep in the fridge for a couple of days)

I really enjoyed mine with my salmon steak however it did feel a bit thick for me so next time I would add more olive oil and perhaps think about roasting my garlic in the oven first and then squeeze this sweet garlic into my Verde and then blitz. I will also be trying pure Jack by the hedge (garlic mustard) salsa verde... yum.

References

Bruton-Seal, J & Seal, M. (2008) Hedgerow Medicine: Harvest and Make Your Own Herbal Remedies, Merlin Unwin Books  Ltd, London. p, 114.
Irving, M. (2009) The Forager Handbook: A Guide To The Edible Plants Of Britain, Ebury Press Publishing, p, 77.